

Tools required:
- Valve core removal tool (provided in ride pack)
- Tubeless sealant (2 x 60ml provided in rider pack)
- Track pump
Step 1
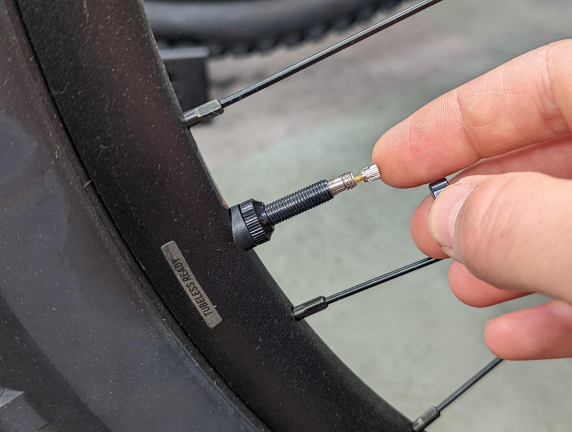
Prepare your sealant by first shaking vigorously, then unscrew the lid, remove the seal and reinstall the lid. Next, unscrew the valve cap and release air pressure from the tyre.
Step 2
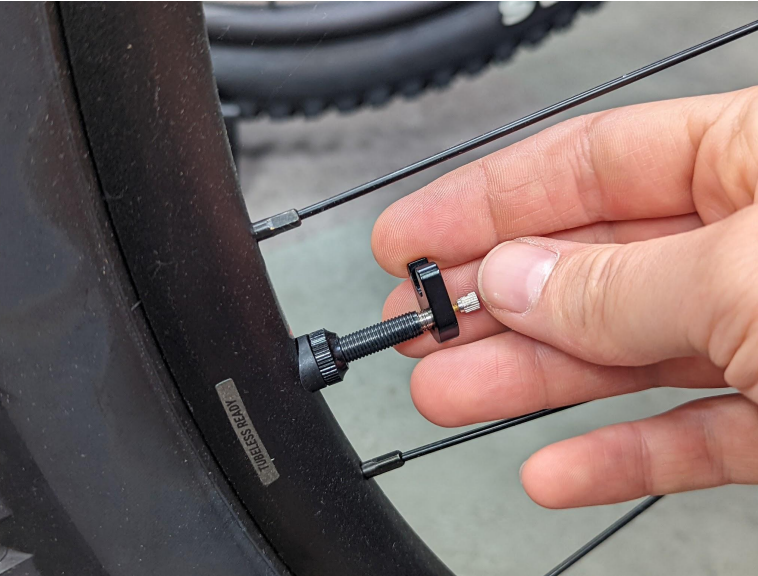
Using the included valve core removal tool from the rider pack, engage the valve core removal tool onto the valve core -making sure the straight edges of the tool align with the straight sides of the valve core. Carefully unscrew the valve core and put it aside
somewhere safe for now.
Step 3
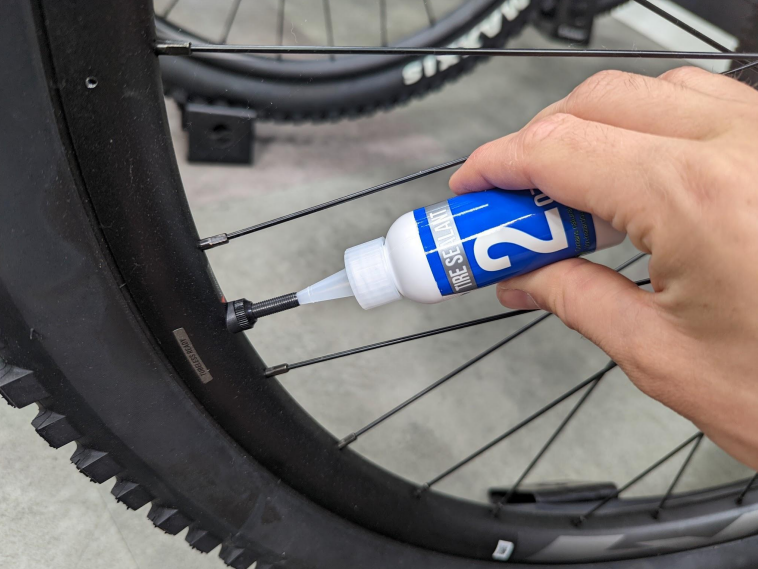
With the wheel and valve at the 8 o’clock position – remove the nozzle cap from the sealant bottle, now gently insert the nozzle into the valve core and gently squeeze the bottle to insert the recommended sealant quantity into the tyre.
Step 4
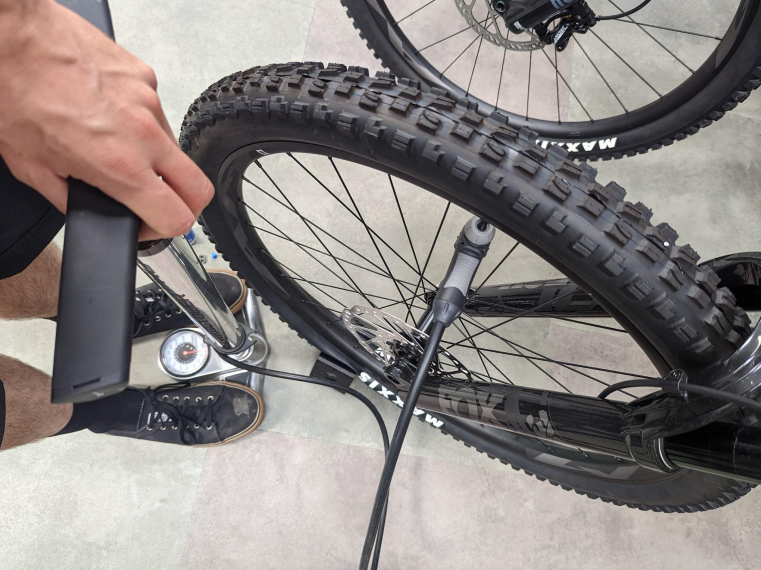
Reinstall the valve core and carefully rotate the valve into the 12o’clock position – this will move the sealant to the bottom of the tyre away from the valve and ensure you don’t get splattered with sealant when you remove the pump after inflation. Inflate the tyre to the recommended tyre pressure (written on the tyre and
expressed as a range – usually between 40 and 75 psi ).
Helpful Tips
- It can be a good idea to make sure when your bike is stored to keep the valves at the 12 o’clock position to avoid the valves getting clogged with sealant.
- Keep an eye on your tyres – a good time is when you wash your bike after a ride – inspect
for any nicks or punctures and top-up sealant if you do get a puncture. - Tyre sealant needs to be changed out – usually, after a MAXIMUM of 6 months (depending on conditions) – sealant will begin to separate around this time and not perform its duty of sealing punctures. Set a reminder on your phone calendar to do this.


